
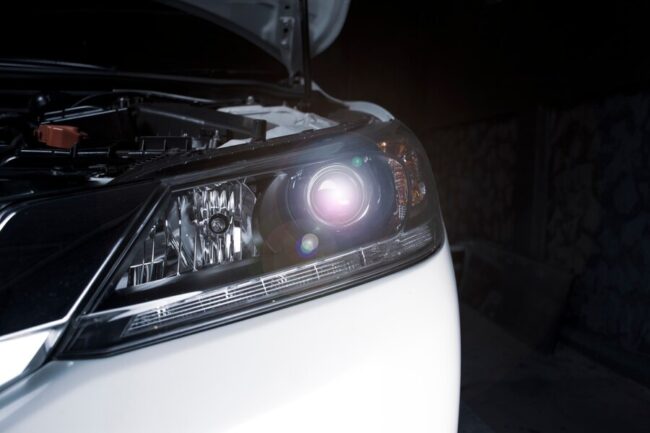
Headlights are essential for safe driving and play a significant role in defining a car’s appearance. However, over time, factors like UV exposure, oxidation, and environmental elements can cause headlights to lose clarity and brightness, impacting aesthetics and safety.
This comprehensive guide will delve into headlight restorations—a process that can breathe new life into your vehicle’s headlights. Whether you’re dealing with cloudiness, yellowing, or reduced brightness, this guide will walk you through restoring your headlights to their former glory.
Join us as we explore the causes of headlight deterioration, the step-by-step restoration process, and the pros and cons of DIY versus professional restoration. We’ll also share maintenance tips to help prolong the clarity and effectiveness of your restored headlights.
Understanding Headlight Deterioration
Understanding Headlight Deterioration is crucial for maintaining vehicle safety and aesthetics. Over time, headlights can deteriorate due to various factors, including UV exposure, oxidation, and environmental elements. Signs of deterioration often include cloudiness, yellowing, and a reduction in brightness, which can significantly impact nighttime visibility and overall safety while driving. Recognizing these signs and understanding the underlying causes can help car owners take proactive measures to address headlight deterioration through restoration techniques, ensuring optimal performance and appearance of their headlights.
Benefits Of Headlight Restorations
Restoring headlights offers several critical benefits for vehicle owners:
- It significantly improves visibility and safety while driving at night or in low-light conditions. Clear, properly functioning headlights enhance the driver’s ability to see the road ahead and potential hazards, reducing the risk of accidents.
- Restoring headlights can enhance the overall appearance of the vehicle. Dull, yellowed, or cloudy headlights can detract from the car’s aesthetics, while restored headlights can give the vehicle a fresher, more polished look.
- By restoring rather than replacing headlights, vehicle owners can save money, as professional restoration services or DIY kits are often more cost-effective than purchasing new headlights.
Overall, headlight restorations not only improve safety and aesthetics but also offer a practical and economical solution for maintaining and enhancing the longevity of a vehicle.
The Headlight Restoration Process
- Gather Your Supplies:
- Headlight restoration kit (including sandpaper, polishing compound, and sealant)
- Masking tape
- Clean cloth
- Water spray bottle
- Preparation:
- Park the vehicle in a shaded or covered area to prevent the products from drying too quickly and ensure a more controlled environment for restoration.
- Clean the headlights thoroughly with soap and water to remove any dirt, grime, or residue that may interfere with the restoration process. Dry the headlights entirely before proceeding.
- Tape Off Surrounding Areas:
- Use masking tape to protect the paint and other surrounding areas of the car from accidental scratches or damage during the restoration process. Ensure the tape is securely applied and covers the areas adjacent to the headlights.
- Wet Sanding:
- Wet the headlight surface with water from a spray bottle to keep it lubricated during sanding.
- Start with your kit’s lowest-grit sandpaper (e.g., 400 grit). The lower grits are more abrasive and can effectively remove surface imperfections, oxidation, and yellowing.
- Hold the sandpaper firmly but gently and sand the headlight in a back-and-forth motion, ensuring even coverage. Keep the surface wet to prevent overheating and damage to the plastic.
- Continue sanding until the surface feels smooth and the yellowing or oxidation is visibly reduced or removed. This may require several passes, depending on the severity of the damage.
- Rinse the headlight with water to remove any sanding residue and inspect the surface. Repeat the wet sanding process with finer grit sandpaper (e.g., 800 grit) for a smoother finish.
- Polishing:
- Apply a small polishing compound from your kit to a clean cloth or pad. Polishing compounds are abrasive and help to smooth and refine the surface of the headlight further.
- Buff the headlight in circular motions, applying moderate pressure. The goal is to evenly distribute the polishing compound and work it into the surface to remove any remaining imperfections and enhance clarity.
- Continue buffing until the headlight becomes clear and shiny, periodically checking your progress. You may need to apply more polishing compounds as you work, especially for heavily oxidized or damaged headlights.
- Wipe any excess compound with a clean cloth to reveal the restored surface. This step should result in a significantly improved appearance with restored clarity and brightness.
- Sealing:
- Apply a UV-resistant sealant or clear coat from your kit to protect the headlight from future oxidation and UV damage. These sealants provide a protective barrier that helps maintain the clarity and longevity of the restoration.
- Follow the manufacturer’s instructions for the application process and drying time. Some sealants may require multiple coats or specific curing times to ensure optimal protection.
- Final Inspection:
- Remove the masking tape carefully to reveal the fully restored headlights. Inspect the headlights for missed spots, streaks, or imperfections requiring further attention.
- Touch up as needed with additional sanding or polishing to achieve the desired level of clarity and finish. Take your time to ensure that the headlights look uniform and defect-free.
- Maintenance:
- Regularly clean the restored headlights with a mild soap and water solution to remove dirt, grime, and other contaminants. Avoid using abrasive cleaners or harsh chemicals that can damage the sealant and finish.
- Apply a UV-resistant sealant periodically, as the manufacturer recommends, or based on your climate and driving conditions. This will help maintain the protective coating and prolong the clarity of the headlights.
- Inspect the headlights periodically for signs of fading, yellowing, or oxidation. If needed, repeat the restoration process to restore clarity and brightness.
By following these detailed steps, you can effectively restore your headlights to their original clarity and brightness, enhancing your vehicle’s safety and aesthetics.
DIY vs. Professional Restoration
DIY Headlight Restoration:
Pros:
- Cost-effective: DIY kits are generally more affordable than professional services.
- Convenience: This can be done at home, saving time and effort.
- Accessibility: DIY kits are readily available in auto parts stores and online.
- Satisfaction of accomplishment: Some people enjoy the hands-on experience and satisfaction of restoring their headlights themselves.
Cons:
- Skill and experience required: DIY restoration requires following instructions carefully and may yield more than professional-level results for severe damage.
- Time-consuming: Depending on the extent of damage, DIY restoration can be time-consuming, especially for beginners.
- Limited results: DIY kits may be less effective for heavily oxidized or damaged headlights, resulting in less durable results.
Professional Headlight Restoration:
Pros:
- Expertise and equipment: Professional services have the expertise and specialized tools for thorough and effective restoration, especially for severe damage.
- Quality results: Professional restoration often achieves better and longer-lasting results than DIY kits.
- Time-saving: Professionals can complete the restoration process quickly, saving the vehicle owner time and effort.
- Warranty or guarantee: Some professional services offer warranties or guarantees for their work, providing added assurance.
Cons:
- Cost: Professional restoration services are typically more expensive than DIY kits.
- Limited availability: Depending on location, access to professional services may be limited compared to the availability of DIY kits.
- Less hands-on involvement: Some car owners prefer the hands-on experience of DIY restoration and may want to refrain from delegating this task to professionals.
Which Option to Choose:
- DIY kits can be a cost-effective and convenient solution for minor to moderate headlight damage, especially for those who enjoy DIY projects.
- Professional restoration services are recommended for severe damage or those seeking professional-quality results with a warranty or guarantee. They offer expertise, advanced equipment, and the assurance of professional-grade results.
Maintenance Tips For Extended Clarity
- Regular Cleaning: Clean your headlights regularly to remove dirt, grime, and other contaminants that can build up and reduce clarity. Use a mild car washing soap and a soft cloth or sponge to scrub the headlights gently.
- UV-Resistant Sealants: Apply a UV-resistant sealant or coating to your headlights after restoration to protect them from UV rays, which can cause yellowing and cloudiness over time. These sealants can help maintain the clarity of your headlights for more extended periods.
- Avoid Harsh Chemicals: Avoid using harsh chemicals or abrasive cleaners on your headlights, as they can damage the protective coating and contribute to deterioration. Stick to gentle cleaning solutions specifical
 ly designed for automotive use.
 - Park in Shaded Areas: Whenever possible, park your car in shaded areas or use a car cover to protect your headlights from direct sunlight. This can help reduce UV exposure and prolong the clarity of your headlights.
- Regular Inspection: Periodically inspect your headlights for any signs of cloudiness, yellowing, or damage. Catching and addressing issues early can prevent them from worsening and requiring more extensive restoration in the future.
- Professional Inspection: Consider having your headlights professionally inspected and maintained annually or as needed. Professionals can identify and address issues before they become severe, ensuring your headlights stay clear and functional.
 ly designed for automotive use.
Conclusion
As we conclude our journey through headlight restorations, it’s clear that revitalizing your headlights goes beyond mere aesthetics. It’s about safety, efficiency, and preserving the beauty of your vehicle. By understanding the causes of headlight degradation and learning the steps to restore them, you can enhance your driving experience and ensure maximum visibility on the road.
Ready to give your headlights a new lease on life? Explore our comprehensive guide to headlight restorations and discover the tools, techniques, and products needed to achieve professional results. Don’t let cloudy, yellowed headlights dim your driving experience. Take the first step towards clarity and safety today.
