In the world of automotive care and maintenance, ceramic coatings have gained immense popularity for their ability to provide long-lasting protection and a brilliant shine to vehicle surfaces. While getting a professional ceramic coating applied to your car can be quite expensive, many enthusiasts are turning to the DIY route to achieve similar results at a fraction of the cost. However, diving into the world of DIY ceramic coating can be daunting, especially for beginners.
Fear not, as we’ve got you covered with this comprehensive guide on DIY ceramic coating. Whether you’re a seasoned car enthusiast looking to save some cash or a newbie eager to explore the world of auto detailing, we’ll walk you through everything you need to know to achieve professional-grade results right in your own garage.
From understanding the basics of ceramic coatings to mastering the application process and avoiding common pitfalls, we’ll share valuable tips and tricks to help you embark on your DIY ceramic coating journey with confidence. So, roll up your sleeves, gather your supplies, and let’s get started on transforming your ride into a showroom-worthy masterpiece!
Understanding Ceramic Coatings: Basics
Ceramic coatings are revolutionary in their ability to safeguard your vehicle against environmental threats and UV damage. Utilizing nano-ceramic particles, these coatings create a robust barrier that chemically adheres to the surface, providing unparalleled protection against water, dirt, and pollutants. Unlike conventional wax or sealants, ceramic coatings offer long-lasting durability, promising years of defense with routine care and maintenance.
This innovative technology not only preserves your vehicle’s aesthetics but also minimizes the need for frequent cleaning and detailing. By investing in a ceramic coating, you ensure that your vehicle maintains its pristine condition, even in the face of harsh environmental conditions and daily wear and tear.
Benefits of Ceramic Coatings
Ceramic coatings offer a multitude of benefits, making them a worthwhile investment for any vehicle owner.
 Exceptional Protection: Ceramic coatings create a durable shield against scratches, swirl marks, and UV damage, preserving the vehicle’s paintwork and exterior surfaces for years to come.
- Enhanced Aesthetics: By providing a glossy and sleek finish, ceramic coatings elevate the appearance of the vehicle, giving it a showroom-worthy shine that lasts.
- Hydrophobic Properties: The hydrophobic nature of ceramic coatings repels water and contaminants, making it easier to clean and reducing the frequency of car washes.
- Longevity: With proper application and maintenance, ceramic coatings offer long-lasting protection, extending the lifespan of the vehicle’s exterior surfaces.
- Reduced Maintenance: Ceramic coatings minimize the need for waxing and polishing, saving time and effort on regular upkeep while maintaining a pristine appearance.
Essential Supplies Needed
Embarking on a DIY ceramic coating project requires meticulous preparation. Before you begin, gather essential supplies such as ceramic coating products, applicator pads, microfiber towels, masking tape, and isopropyl alcohol for surface preparation. Having these items on hand ensures a smooth and efficient application process.
Additionally, working in a well-ventilated area and donning proper protective gear, such as gloves and a mask, is crucial for your safety and the effectiveness of the coating. By taking these preparatory steps seriously, you set the stage for a successful ceramic coating application, ensuring optimal results and long-lasting protection for your vehicle’s surfaces.
Surface Preparation Techniques
Before applying a ceramic coating, proper surface preparation is essential to ensure optimal adhesion and longevity of the coating. Here are some key techniques:
- Thorough Washing: Begin by washing the vehicle with a pH-neutral shampoo to remove any dirt, grime, or residues that may be present on the surface. Use a microfiber wash mitt to gently agitate the surface and loosen stubborn contaminants.
- Clay Bar Treatment: Employ a clay bar to eliminate embedded contaminants such as tar, tree sap, or industrial fallout. Glide the clay bar across the surface using a lubricant to prevent scratching and ensure a smooth finish.
- Degreasing with Isopropyl Alcohol: Wipe down the surface with isopropyl alcohol to remove any remaining oils, waxes, or residues that could impede the coating’s adhesion. Use a clean microfiber towel to ensure thorough coverage and dry the surface completely.
- Masking Off: To protect sensitive areas such as rubber trim, plastic panels, or glass windows from accidental coating application, use masking tape to create clean boundaries. This ensures precise application and prevents any unwanted residue on non-coated surfaces.
Understanding Application Methods
When it comes to applying ceramic coatings, there are several methods available, each offering distinct benefits and potential pitfalls. Whether you choose to apply the coating through spray-on, wipe-on, or brush-on techniques, the key is to achieve uniform coverage while avoiding over-application to prevent streaks or uneven drying. Tailoring your chosen method to your skill level and personal preferences is crucial for achieving optimal results and ensuring a rewarding DIY experience.
By understanding the nuances of each application method and practicing proper techniques, you can enhance the longevity and effectiveness of the ceramic coating, ultimately preserving the beauty and integrity of your vehicle’s surfaces for years to come. So, experiment with different approaches, refine your skills, and enjoy the satisfaction of protecting your vehicle with a professional-grade ceramic coating application.
Tips for Even Coating Distribution
Achieving even coating distribution is crucial for optimal results when applying a ceramic coating to your vehicle. To ensure uniform coverage:
- Apply the coating in thin, overlapping layers to prevent buildup and streaking.
- Use gentle, consistent motions to distribute the product evenly across the surface.
- Work in small sections to maintain control and avoid missing spots.
- Buff off any excess product immediately to prevent uneven drying and residue buildup.
Maintaining a steady pace and paying attention to detail will help you achieve a flawless finish and maximize the effectiveness of your ceramic coating.
Buffing and Polishing Techniques
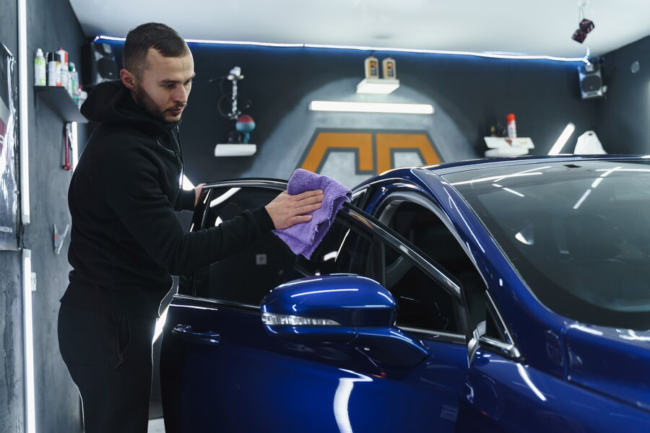
When it comes to buffing and polishing techniques for ceramic coatings, precision and finesse are key. Begin by gently buffing the coated surfaces with a clean microfiber towel, ensuring a smooth and streak-free finish. For stubborn residues or imperfections, consider using a polishing compound or finishing polish to restore the surface’s original luster and vibrancy. Here are four essential tips for achieving impeccable results:
- Use Gentle Pressure: Apply light pressure while buffing to avoid damaging the coating or causing streaks. Gentle, circular motions are ideal for distributing the polish evenly and achieving a uniform shine.
- Work in Small Sections: Divide the vehicle into manageable sections to ensure thorough coverage and consistent results. This approach allows you to focus on one area at a time, preventing the polish from drying prematurely or causing uneven application.
- Change Towels Regularly: Swap out microfiber towels frequently to maintain optimal performance and prevent cross-contamination. Using clean towels ensures that you’re not inadvertently spreading residues or contaminants onto freshly polished surfaces.
- Inspect and Touch-Up as Needed: After completing the buffing and polishing process, inspect the coated surfaces for any remaining imperfections or areas that may require additional attention. Touch up any uneven areas or blemishes to achieve a flawless finish across the entire vehicle.
Dealing with Common Mistakes
Despite meticulous efforts, occasional mishaps may arise during the ceramic coating process. Common issues such as streaking, uneven coverage, or premature drying can be rectified with patience and persistence. Should such challenges arise, simply reapply the coating to the affected areas and buff off any excess product to achieve a flawless finish. Embracing these learning opportunities is integral to honing your skills in DIY ceramic coating.
Curing and Drying Processes
 Once the ceramic coating is applied, it’s crucial to allow for sufficient curing and drying time to unlock its full protective potential. Following the manufacturer’s guidelines on curing times, temperature requirements, and humidity levels is imperative for achieving optimal results. During this critical phase, it’s essential to refrain from exposing the coated surfaces to water or harsh chemicals, as these can undermine the coating’s integrity and longevity.
By patiently adhering to the recommended curing procedures, you ensure that the ceramic coating bonds effectively with the surface, forming a robust barrier against environmental contaminants and UV damage. Ultimately, investing the time and effort into proper curing and drying processes will significantly enhance the durability and performance of your ceramic coating, ensuring enduring protection and a brilliant shine for your vehicle’s surfaces..
Maintenance and Longevity Tips
Buffing and polishing are essential steps in the ceramic coating process to enhance the gloss and shine of your vehicle’s surfaces. Here are some techniques to achieve optimal results:
- Use gentle circular motions: When buffing the coated areas, employ gentle circular motions with a clean microfiber towel to avoid scratching or marring the surface. This ensures an even distribution of the coating and a smooth finish.
- Apply consistent pressure: Maintain consistent pressure while buffing to ensure uniform results across the entire surface. Avoid exerting too much pressure, as it may lead to uneven coating distribution or streaking.
- Work in small sections: Divide the vehicle into manageable sections and focus on buffing one area at a time. This allows for better control and ensures thorough coverage without missing any spots.
- Use a finishing polish: For stubborn residues or imperfections, consider using a finishing polish to restore the surface’s original luster and vibrancy. Apply the polish sparingly and buff it off gently to avoid damaging the ceramic coating.
In conclusion, mastering the art of DIY ceramic coating requires a blend of knowledge, patience, and practice. By understanding the basics, utilizing proper techniques, and avoiding common pitfalls, you can achieve professional-grade results right in your own garage. With the myriad benefits of ceramic coatings, including exceptional protection, enhanced aesthetics, and longevity, investing time and effort into this endeavor pays off manifold in the long run.
Ready to elevate your vehicle’s protection and aesthetics with DIY ceramic coating? Visit Ceramic Garage today to explore our range of high-quality ceramic coating products and accessories. With our dedication to harnessing cutting-edge technology and our commitment to customer satisfaction, you can trust Ceramic Garage to be your partner in achieving automotive excellence. Contact us at (209) 780-7170 or email support@ceramicgarage.com to learn more and take the first step towards transforming your ride into a showroom-worthy masterpiece.


 Exceptional Protection:
